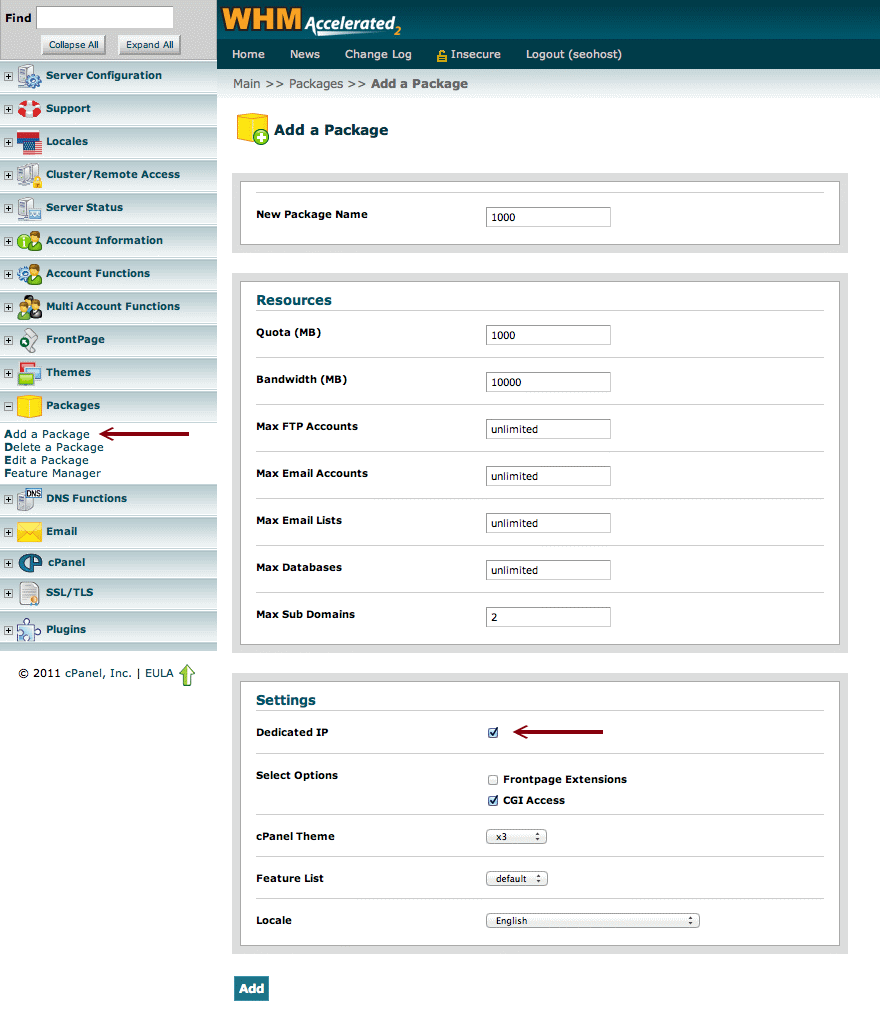
Add A Package
Packages allow you to create accounts with a preset amount of disk space, bandwidth, email accounts, etc, and are very useful for your business. With packages, you can cut precious minutes off the time it takes to create a new account.
1) To access the Packages Menu, click on Packages, on the main screen of your WHM interface.
2) Click on Add Packages.
3) Enter the name of the package and the maximum disk space the account can occupy in the Package Name and Quota fields.
4) Enter the maximum number of items allowed in the Max FTP Accounts, Max Email Accounts, Max Email Lists, Max SQL Databases field.
5) Indicate whether this account will use a dedicated IP, it should be ticked if you want to assign an ip to your domains names.
6) Indicate whether CGI access and FrontPage Extensions are allowed in the CGI Access and FrontPage Extensions tick boxes.
7) Click on the default cPanel theme for the account in the cPanel Theme field.
8) Click on the default feature list for the account in the Feature List field.
9) Click on Create.
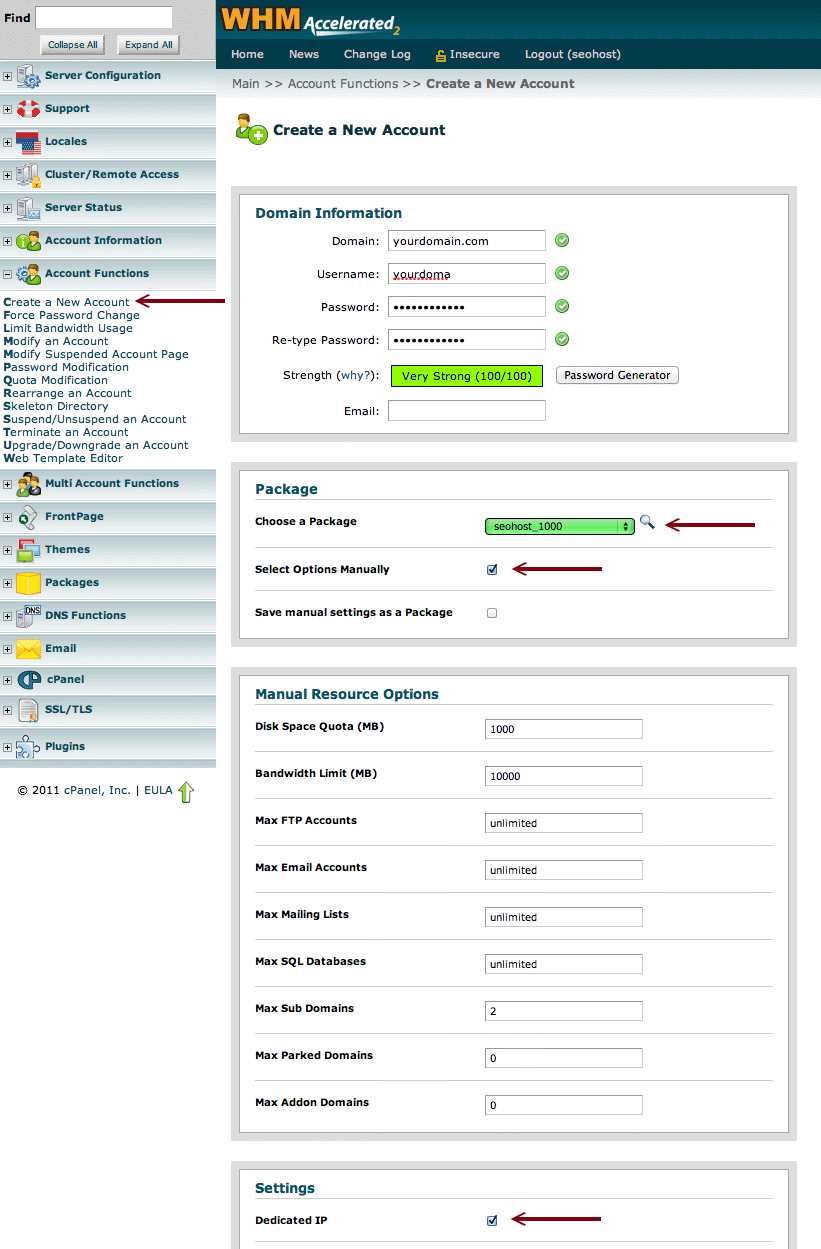
Create a New Account
WebHost Manager enables you to quickly add new accounts. To do this, you simply fill in the fields to specify the account details. Using packages will speed up this process considerably - refer to Packages for more information.
1) To access the Account Functions Menu, click on Account Functions, on the main screen of your WebHost Manager interface.
2) Click on Create a New Account.
3) Enter the domain name and username of the account in the Domain and UserName fields. The UserName field will automatically populate with the first eight characters of the domain name, but you can change this to whatever you want.
4) Enter the password.
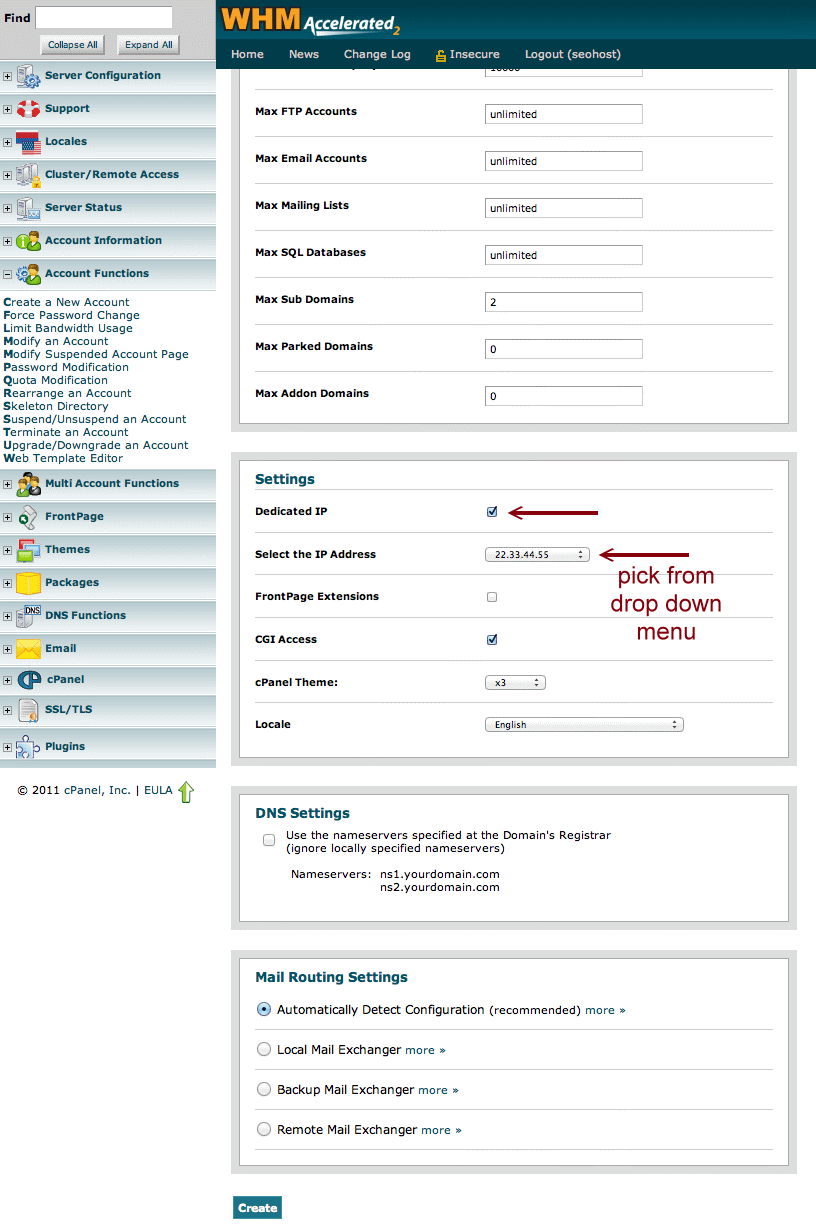
5) Choose a package from drop down menu.
6) Tick the box of "Select Options Manually". (Features of choosen packages will appear under "Manual Resource Options", no need to edit those options.
7) Pick an ip address from your ip pool (drop-down menu) under "Setting" option.
8) Click on Create.
Edit DNS Zone
WebHost Manager enables you to change a wide variety of DNS information at any time.
WARNING: Do not edit a DNS zone unless you know what you are doing.
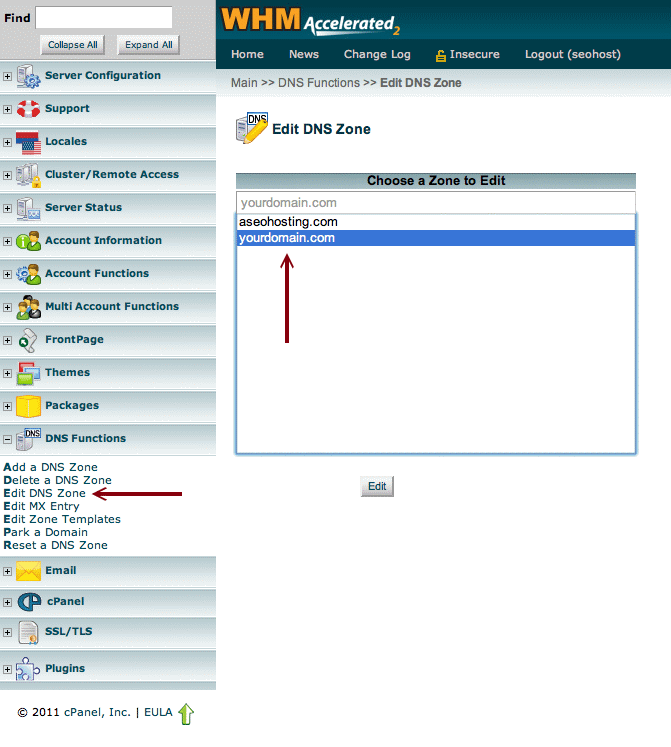
1) To access the DNS Functions Menu, click on DNS Functions, on the main screen of your WebHost Manager interface.
2) Click on Edit a DNS Zone.
3) Enter the DNS zone that you want to edit in the Zone to Edit field and click on Do it.
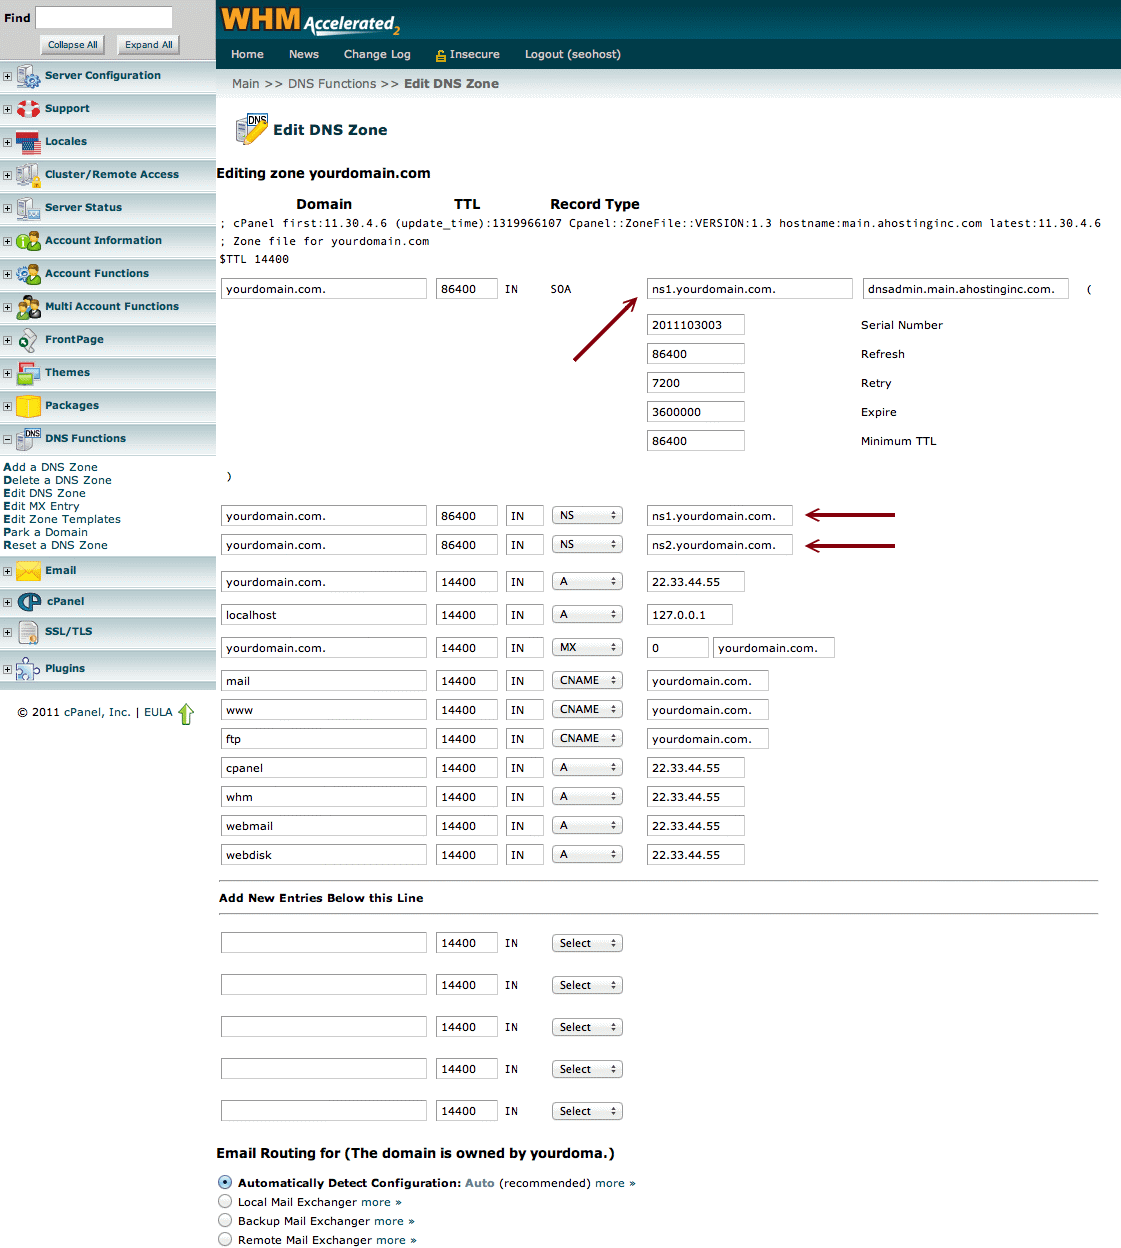
4) Change nameservers to your private nameservers.
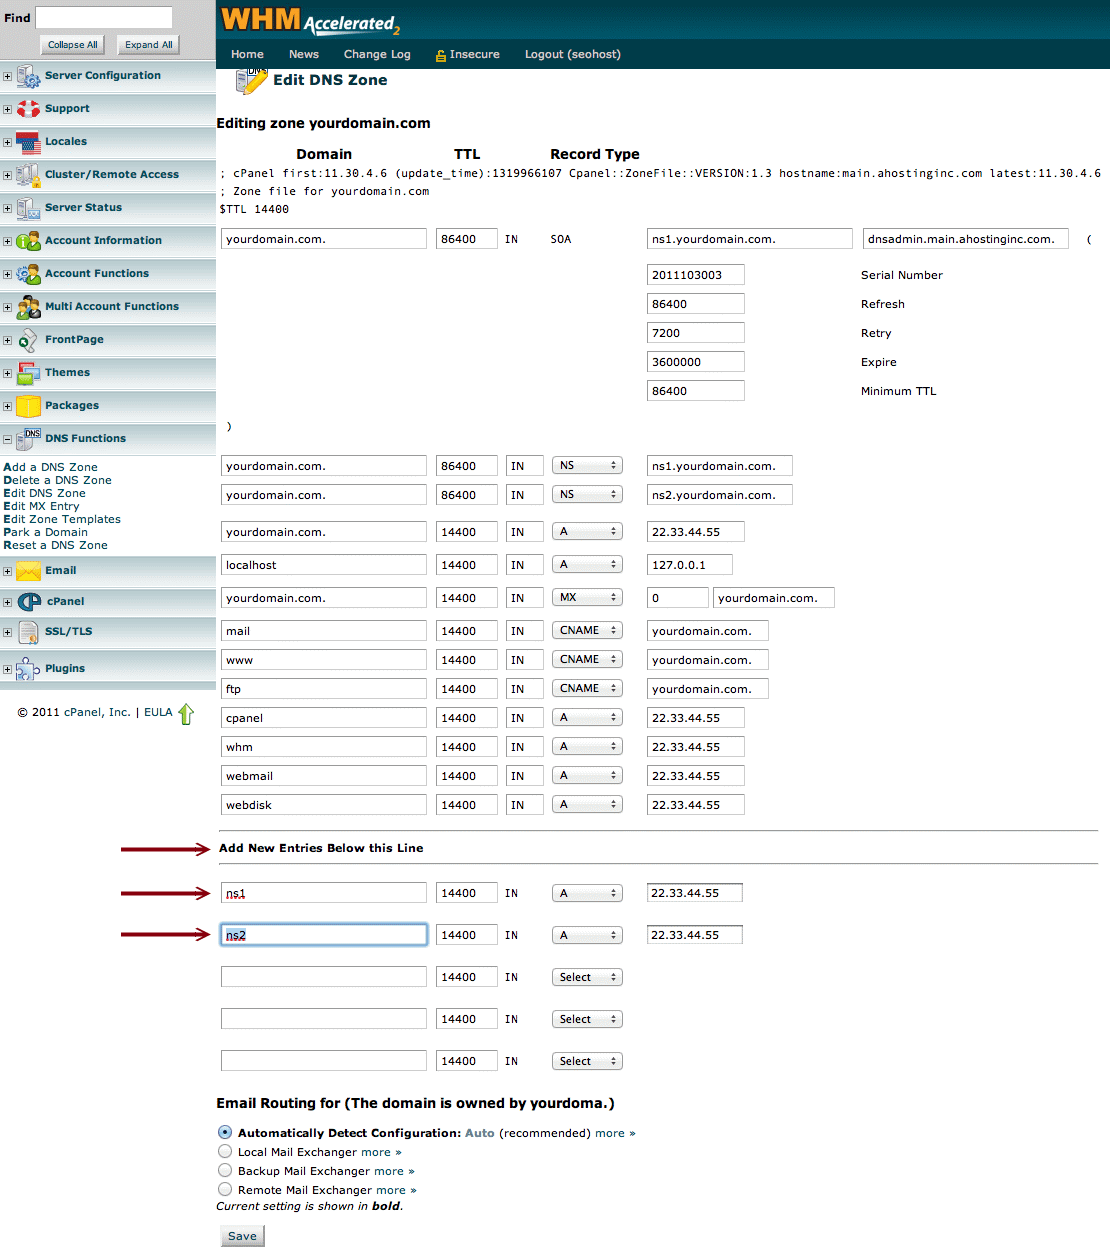
5) Add New Entires Below this line (please check images how to do)
6) Alter the DNS fields as you require, and click on Save when you have finished.